How to add users to a Cloudflare account
Cloudflare account terminology and how to add profiles to an account

A break from this site's usual higher-level tech posts, this post walks through the process of adding users to a Cloudflare account ad briefly covers a few account-related terms.
As a prerequisite, let's take a quick moment to look at three different Cloudflare terms that will be important: Zones, Profiles, and Accounts. If someone asks for access to your Cloudflare account, they're not asking for your username and password, instead, they're asking you to create a profile for them within your account.
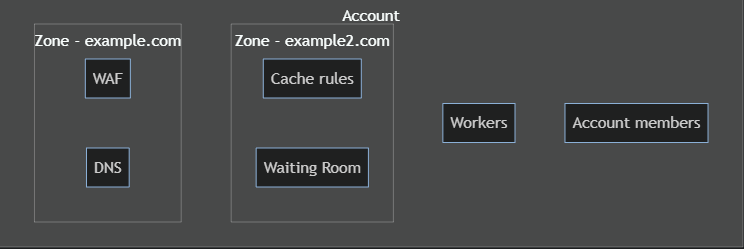
Zones
A zone is most closely related to a domain but not to be confused with a website. Your Zones can be found within the homepage of the Cloudflare dashboard and serve as the hub for everything related to a domain using Cloudflare.
I disagree.
— Mackenly Jones (@mackenlyjones) July 31, 2023
Websites have been called zones in the APIs and other places for as long as I remember so relabeling in the dashboard lowers confusion.
In addition a zone in cloudflare doesn't represent a website. Multiple websites can be under the same zone (subdomains, different…
An X of Me Tweeting
Profiles
If you're reading this post, you're probably looking to add a profile to your account. Profiles are individual user logins attached to a single person and should never be shared between team members. A user's profile is tied directly to them and their email address. Profiles have a one-to-many relationship with accounts because a single profile can have access to multiple Cloudflare accounts, which in turn can give a profile access to many different zones.

Accounts
Accounts serve as a container for all of your organization's Cloudflare resources. Accounts hold all your Zones, Workers, Page, D1 databases, etc. One account can have many different profile members, each with their own roles and permissions.
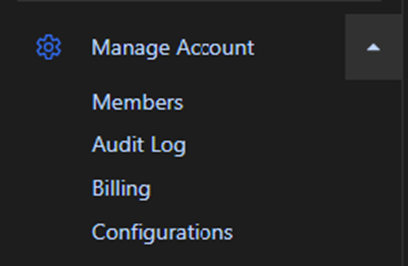
Step 1: Members Page
First, log into your Cloudflare account. Then from the Cloudflare home dashboard, navigate to the side panel and select “Members” from within the “Manage Account” sub-menu.
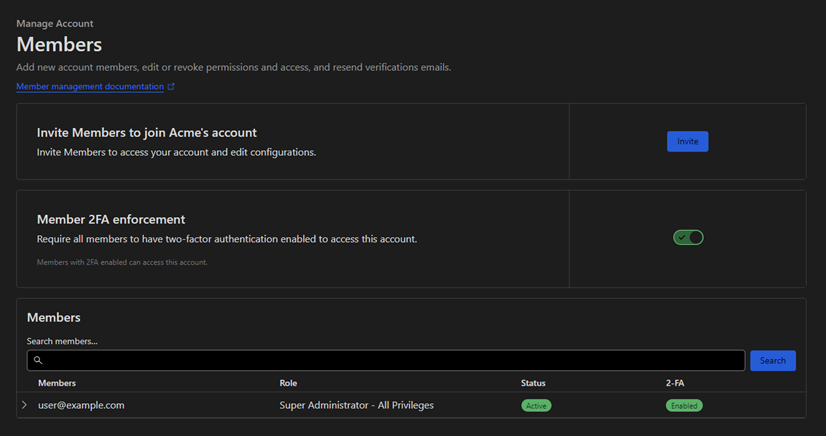
Step 2: Invite a New Member
From the manage account "Members" page, press the invite button or edit an existing member.
If you haven't already, now it a great time to enable "Member 2FA enforcement" to ensure that all of your users have a 2FA method enabled.
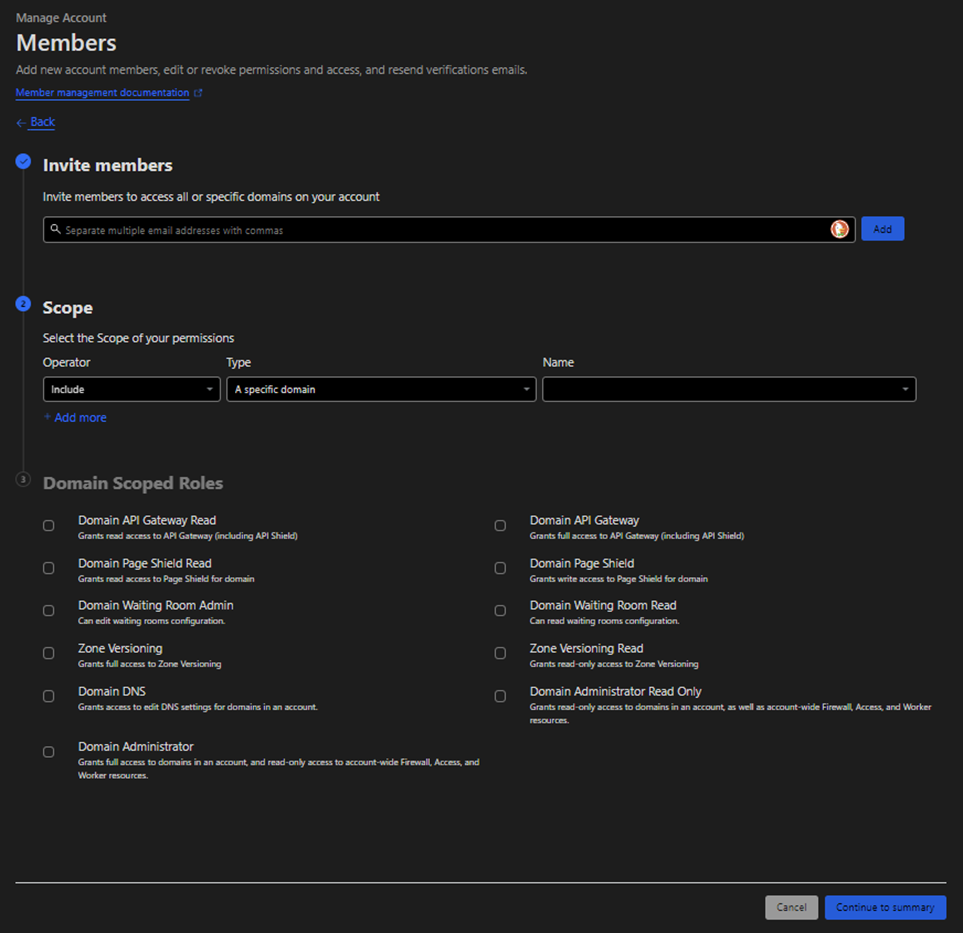
Step 3: Configure Account Privileges
From the invite page, first, enter the email address for your new user(s). Then within the scope section, select either "include" or "exclude" for your scope rule operator. Next, under "Type", select between:
- All domains: Gives the user access to all domains (aka zones) on the account. This option is required to give the user access to account-level resources such as R2, Pages, Workers, Images, etc.
- A specific domain: Select a single domain (or zone) to give the user access to. (You can add multiple zones by adding a rule for each).
- Domain group: Select a predefined group of domains (zones).
What is a zone?
In Cloudflare, a DNS Zone is a single domain name.
- These would be in the same zone: example.com, blog.example.com, and example.com/about
- These would be in separate zones: example.com, example.co, example.co.uk
After selecting the scope for the user, you can now configure the domain-scoped rules. These permissions allow you to control the new user's access level. For example, you may want only to grant read access. Always follow the principle of least privilege when assigning access. Once permissions are selected, press “Continue to summary.” Confirm the options are correct, and finally send the invite.
Now your new user will receive an invite email allowing them to join your Cloudflare account. If you ever need to change privileges or remove users, you can return to the "Members" submenu item under "Manage Account."